Besides the fact that you can set up “Earthlink Webmail Settings” on your mobile phone [Android and iPhone] and Personal computer [Windows and Mac] to reach and send an email utilizing your Earthlink email, you also have the option to create eight email ids for free, each with a database size of 100MB, implying that you can have an overall capacity of 800MB to hold your information on the email service for free with the Earthlink email.
For enabling Earthlink email to function on smartphones and desktops instead of using the authorized Earthlink app for smartphones or the Earthlink website, Earthlink Webmail supports both SMTP and IMAP in both the “Ongoing” and “Incoming” server and port.
As a result, we won’t just talk about how to establish an Earthlink email account in this post; we’ll also go over some important Earthlink.net webmail settings and how to retrieve your Earthlink webmail credentials if you forget.
Create Earthlink Webmail Login
The methods for logging in to your Earthlink Webmail account to update your profile and clients are outlined below.
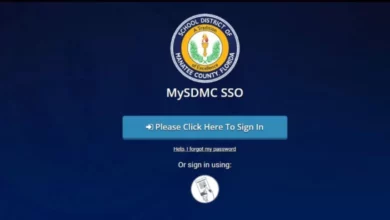
- Use your Earthlink login details and click “Sign In” on the Earthlink website at www.earthlink.net. Remember to provide “[email protected]” as your Earthlink email username.
- Select “Add a new email Profile” from the “Email Profile” menu.
- Create your own Earthlink email account by following the simple steps. For your account, create a username.
- Click “Add Email Profile” to finalize account registration.
Your Earthlink email will be established. You may use the same procedure to generate up to eight separate email addresses from a single Earthlink email account, all of which will be spam- and virus-free.
Reset Earthlink Email Password
To restore your Earthlink email address password, follow the instructions below.
- In a web browser, go to www.webmail.earthlink.net.
- Under the password field, click “Forgot Password.”
- In a new tab, a window will pop up. Fill in your Earthlink email address or ID, check the “I’m not a robot” box, then click “Continue” in the bottom right corner.
- To proceed, authenticate your Earthlink email identification and hit the icon.
- To reset your lost Earthlink email password, change your Earthlink email address and click “Save.”
Earthlink Webmail Settings For iPhone
The Earthlink webmail instructions for configuring your Earthlink email on an iPhone are as follows.
- Go to the Settings app on your iPhone.
- Select “Accounts & Password” from the drop-down menu.
- Select “Add Account” from the “Account” menu.
- Choose “Other” under “Add Account.”
- Select “Add Mail Account” from the “Other” menu.
- Select “Next” after entering your Earthlink email account ([email protected]), passwords, display name, and description.
- Your iPhone will automatically attempt to link to the Earthlink server in order to set up Earthlink Webmail on your iPhone; however, if the connection fails, you must proceed with the manual setup.
- To manually set up your iPhone account Webmail, go to “POP” and input the relevant information, such as the Earthlink login, password, and display name.
- Set your hostname to “pop.domainname.com” in the “Incoming Mail Server” section. Please enter your Earthlink email address and password.
- Set the hostname to smtpauth.earthlink.net in the “Ongoing Mail Server” section and click “Save” to save your changes.
These options will automatically select the appropriate port for your needs. If you get an error warning because of the SSL link, uncheck the checkbox and try again to see what happens.
Earthlink Webmail Settings For Android
The steps to set up and install Earthlink webmail on Android are outlined here.
- Go to the settings on your Android phone.
- Select “Account” >> “Add Account” >> “Email” from the drop-down menu.
- Select “Sign In” and enter your “Earthlink email and matching password.” The Earthlink email profile will be pulled from the Earthlink server by the Email app. It’s possible that the command may produce an error notice, prompting you to resolve to finish the Earthlink webmail settings using the manual settings.
- Choose “IMAP.” Please enter your Earthlink email address as well as your password. Select “Next” after entering “imap.earthlink.net” as the server, port 143 as the port, and secure type SSL/TLS as the security type.
- For the “Outgoing Server,” choose “SMTP.” Fill in the relevant information, such as your Earthlink email account, password, description, and name; choose “Server” as “smtp.earthlink.net,” the port will automatically pull, and click “Next.”
- Check the Earthlink Webmail server you supplied and await for the Earthlink email to appear in your device’s list of email services.
All of your Earthlink mail alerts will now appear on your Android phone, exactly like Gmail email notifications.
Earthlink Webmail Settings For macOS
Here, we will discuss the Earthlink Webmail settings for Mac OS X 10.0 and 10.1.
- Search for “Mail” in your Mac’s search box.
- Select “Mail” from the “Mail Menu,” then “Preferences.”
- Go to “Account >> Create Account” to get started.
- In the “Account Type” field, choose “POP.”
- Fill in your Earthlink email address, complete name, and other details in the Earthlink webmail description.
- Enter “pop.earthlink.net” in the “Hostname” field, then enter your Earthlink password and send an email to [email protected]. This is the incoming server’s configuration.
- Enter “smtpauth.eartlink.net” in the “Outgoing Server” field and your Earthlink email address as the SMTP user.
- To save your changes, click “OK.”
Go to this page for any additional Earthlink Webmail settings and domain information.
Earthlink Webmail Settings On Windows
Users of Windows 10 and previous Windows versions should utilize the Webmail settings.
- Hover your mouse over the “Windows 10” settings gear symbol in the lower-left corner and select “Settings.”
- Select “Manage Account” from the drop-down menu >> Create a new account >> Advanced Configuration.
- “Internet Email” should be selected.
- Input “imap.earthlink.net” for “Incoming email Server,” “SSL/TLS” for account type, and “smtpauth.earthlink.net” for “Outgoing Email Server.”
Save your settings and double-check everything. After that, the Earthlink Webmail Settings will connect to the Earthlink server and begin gathering the required email data.