Well, Capturing screenshots in Windows 10 or how to take screenshots on Windows can be useful for a variety of purposes. For example, many projects necessitate the need to capture snapshots for inclusion in documents. As a result, Windows 10 includes its own screen capture tools. They are, however, somewhat limited; some third-party screen capture software packages offer far more options. This is how to take screenshots using Windows 10 tools and third-party software.
Taking Screenshots Using The Snipping Tool
One of the simplest ways to capture basic snapshots is with Windows 10’s dependable Snipping Tool. This allows you to capture specific areas in screenshots. For example, in the Cortana search box, type’ Snipping Tool.’ Then choose to launch the Snipping Tool. You can also use the following shortcut: “Windows Key” + “Shift” + “S.”
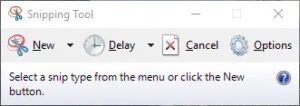
The tool is quite simple. To open a menu with Free-form Snip, Rectangular Snip, Window Snip, and Full-screen Snip options, click the small arrow beside New. Next, select Rectangular Snip, hold down the left mouse button and then drag a rectangle across the desktop or window you want to capture. Then, as shown directly below, your snapshot will open in a Snipping Tool window.

There are a few basic annotation options available. Select a pen color and scribble over the snapshot by clicking Pen. Alternatively, you can highlight specific details in the snapshot by clicking Highlighter and holding down the left mouse button. To save your screenshot, go to File > Save As.
The Free-form Snip mode of the Snipping Tool is more versatile than Rectangular Snip. Further, This allows you to create any kind of outline for the screenshot. As a result, you can take curved-bordered snapshots with it, but it’s not ideal for capturing windows in shots.
Taking Full-screen Snapshots
The “PrtSc” key is more useful for taking full-screen snapshots of the desktop, a game, or a video. Press the PrtSc key after opening a full-screen video or game. This will capture a full-screen screenshot and save it to the Clipboard. To paste the shot, open Paint or your preferred image editing software and press Ctrl + V.
Alternatively, press Alt + PrtSc. Instead, this captures a snapshot of only the active window. Because it excludes UI elements like the Windows taskbar, this hotkey is ideal for capturing snapshots of selected windows. These are the options for taking screenshots with Windows 10’s native tools.
Third-Party Options:
Taking Screenshot Using ShareX
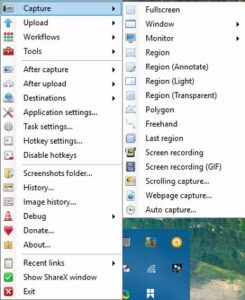
Taking Screenshots with ShareX While Windows 10’s screen-capturing tools are adequate for basic screenshots, ShareX for Windows 10 provides more extensive options. On the ShareX home page, click Download to save the setup and install the program. When the software is running, you can open the menu shown below by right-clicking the ShareX system tray icon.
The first thing to notice about ShareX is that one of its default hotkeys is PrtSc. By pressing that hotkey, you can capture full-screen shots in a similar manner. However, the screenshots will include the cursor, which is normally not included in shots taken with PrtSc in Windows.
You can take region snapshots with ShareX using rectangles, triangles, diamonds, and eclipse shapes. To do so, go to the ShareX menu and select Capture, then Region. This will then launch the Region tool, as shown below.
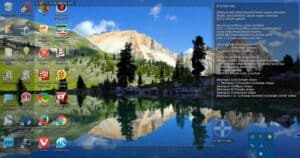
By pressing the number pad keys one through five, you can switch between the various snipping shapes. To select a triangle, for example, press four. Then, using the left mouse button, highlight an area to capture in the screenshot. When you release the mouse button, the captured shot appears in the Greenshot window. An example of a diamond snapshot taken with ShareX’s Region tool is shown below.

Select Capture > Window to take a snapshot of a software window on your taskbar. This brings up a submenu with a list of all your open software windows. From there, choose a window to capture a screenshot of.
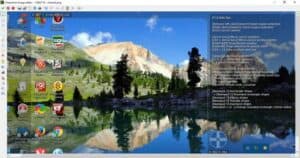
Webpage capture is another useful ShareX feature that allows you to take a snapshot of an entire website page. To open the window shown below, select Webpage capture from the Region submenu. Then, in the URL text box, enter the URL of the page you want to capture and click the Capture button. The window will display a screenshot of the page, which you can then copy to your Clipboard by pressing the Copy button. Next, ctrl + V to paste the shot into Paint.

Editing Snapshots With ShareX
ShareX provides a plethora of tools for further editing snapshots. After you’ve captured a shot, the Greenshot image editor appears below. This includes a plethora of convenient annotation options for screenshots.
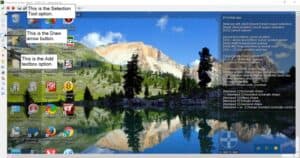
Text boxes and arrows are two of the best tools for annotating screenshots. First, drag a rectangle onto the snapshot after pressing the Add textbox button on the toolbar. Then, enter some text into the box and use the horizontal toolbar’s Line color and Fill color options to select different box and font colors. To add an arrow to a snapshot, click the Draw arrow button, hold down the left mouse button, and drag the cursor. This can then be combined with a text box, as seen in the shot below. To change the position of a text box or an arrow in the screenshot, use the Selection Tool.
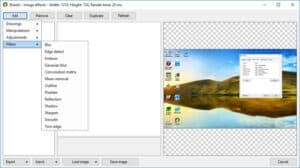
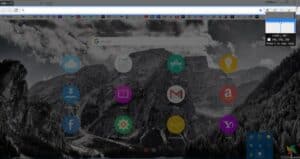
To further edit screenshots in ShareX, go to the software’s menus and select Tools > Image effects, then select a snapshot to open in the editor below. Here, To edit your snapshots with a variety of editing options, click the Add button there and then select Drawings, Filters, or Adjustments. For example, from the Filters sub-menu, you can choose any of the options shown in the snapshot below.
Capture Software UI Elements In Screenshots With Snipaste
Check out Snipaste if you need to capture more specific software UI details in snapshots, such as toolbars, buttons, or the taskbar. This screen capture utility differs from others in that it auto-detects UI elements for screenshots. First, click the 64-bit or 32-bit button on this page to save its Zip folder, which you can decompress in File Explorer by pressing the Extract all button. When you launch the software from the extracted folder, a Snipaste icon will appear in the system tray.
Now, click that icon to take a snapshot. Move the cursor to a specific UI element, such as a toolbar, tab bar, or taskbar, after clicking the Snipaste icon. As shown below, a blue box will highlight a UI element to include in the snapshot.
In the shot below, left-click to confirm your selection and open the toolbar. Then you can choose from a few annotation options. To add text to the screenshot, for example, press the Text button and then click inside the blue rectangle. From the toolbar, you can also choose Arrow, Marker pen, and Pencil.

To save the UI screenshot, click Save to file. Alternatively, you can select Copy to Clipboard and then use the “Ctrl” + “V” hotkey to paste it into another software. You can also use the F3 hotkey to paste the screenshot onto the desktop without using any additional software, as shown below. Finally, to close the toolbar without saving the screenshot, press the Quit snipping button.

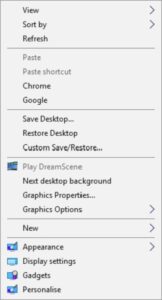
To capture context menus or other menus in snapshots, use the Snipaste Snip hotkey. For example, when the context menu is open, right-click the Windows desktop and press F1. Then, as shown below, you can use the Snipaste tool to capture a snapshot of that context menu.
Also, Check :
The Bottom Line:
So that’s is how to take screenshot in Windows 10 using both the built-in tools and third-party software. The Windows 10 tools will suffice if you only need to capture basic screenshots. However, if you need to capture and edit more specific things in snapshots, such as UI elements or website pages, install ShareX and Snipaste on your desktop or laptop.